Check Out
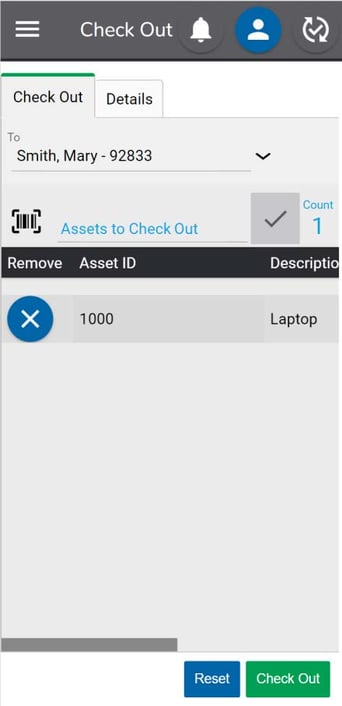
To check an item out to a Person, go to the Check Out function under Transactions.
In the To field, select the Person the assets will be checked out to. People can be created and deleted in the Setup tab. If using a mobile barcode scanner, a Person ID barcode can also be scanned.
Next, enter the Asset ID of the first asset to be checked out and click the check mark to add it to the check out grid. If using a mobile barcode scanner or camera, scan the barcode of the first asset. If the mobile scanner is programmed to perform a carriage return after each scan, the asset will automatically be added to the grid. If using a mobile device with a camera, the camera can also scan a barcode by clicking on the ![]() icon.
icon.
Continue to scan any additional assets for this transaction.
Click the X next to the asset in the grid to remove it.
The total number of transacted assets will be displayed.
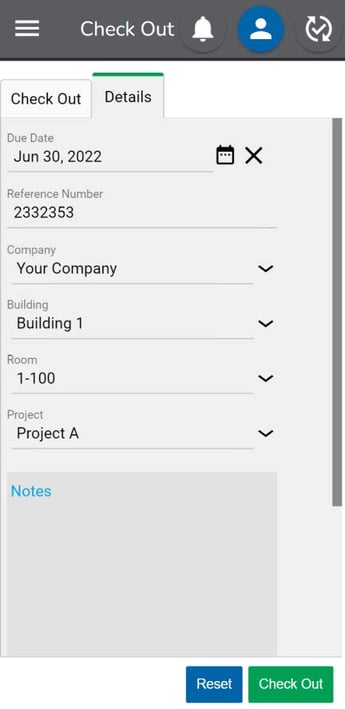
If desired, additional information about the transaction can be added in the Details tab. The detail fields include:
- Due Date – The date an asset is due to be checked back in.
- Reference Number – A number the user wants associated with the transaction.
- Company – The Company to which the asset should be moved during the transaction.
- Building - The Building to which the asset should be moved during the transaction.
- Room - The Room to which the asset should be moved during the transaction.
- Project – The Project the transaction is associated with.
- Notes – Any notes for the transaction.
When done, click the Check Out button to complete the transaction. Information about the Person the asset is checked out to will display in the Checked Out section of the asset record.
If an asset is checked out, it can be checked out to another Person without it first having to be checked back in.
Check In
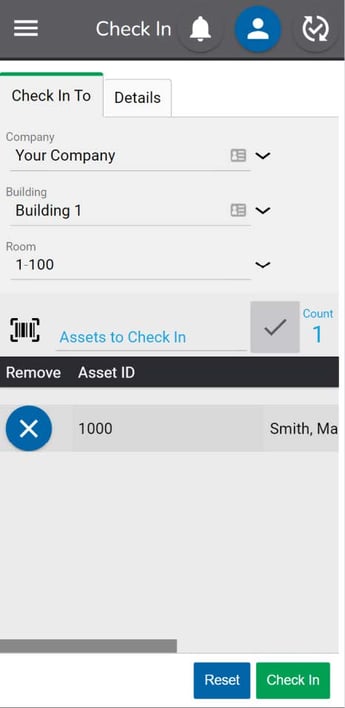
To check in an item, go to the Check In tab under Transactions.
Select the Company, Building and Room the assets will be checked in to. Once these values are selected the first time, they will be remembered in the same browser until changed.
Next, enter the Asset ID of the first asset to be checked in and click the check mark to add it to the check in grid. If using a mobile barcode scanner or camera, scan the barcode of the first asset. If the mobile scanner is programmed to perform a carriage return after each scan, the asset will automatically be added to the grid. If using a mobile device with a camera, the camera can also scan a barcode by clicking on the ![]() icon.
icon.
Continue to scan any additional assets for this transaction.
Click the X next to the asset in the grid to remove it.
The total number of transacted assets will be displayed.
If an asset is entered or scanned into a location other than the one it was previously found in, a message will pop up indicating this. Continuing will assign the asset to the new location.
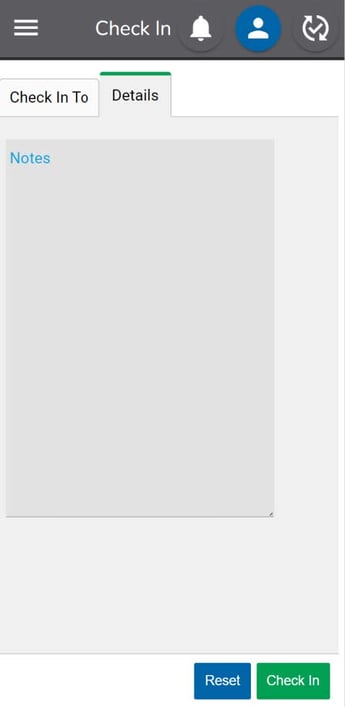
If desired, additional information about the transaction can be added in the Details tab. The detail fields include:
- Notes – Any notes for the transaction
When done, click the Check In button to complete the transaction.
If an asset is checked in, it can be checked in again without having to be checked out.