In order to use the Inventory functions on the mobile device, an inventory must be opened in the full application on a PC or laptop under Manage inventory first.
Take
When taking a physical inventory, users will go from room to room in a building and scan or enter each asset as found. This is easier and more efficient using a mobile device with a built-in barcode scanner.
It is recommended to use the mobile Take function for this process; however, users can take an inventory on a PC or laptop by navigating to the Take tab.
A list of all assets will be displayed in the grid until location filters are selected.
Select the Company, Building and Room where the assets to be scanned or entered reside. If only one Company exists, only the Building and Room fields will display.
Once the Room is selected, only the assets in that Room will be displayed, with Unfound assets defaulted to the top of the list. This gives the user an idea of the assets they should look for during the inventory.

A user can type or use the mobile barcode scanner to scan the Asset ID or Serial #. If using a mobile device with a camera, the camera can also scan a barcode by clicking on the ![]() icon. Please note that the Asset ID and Serial # are case sensitive.
icon. Please note that the Asset ID and Serial # are case sensitive.
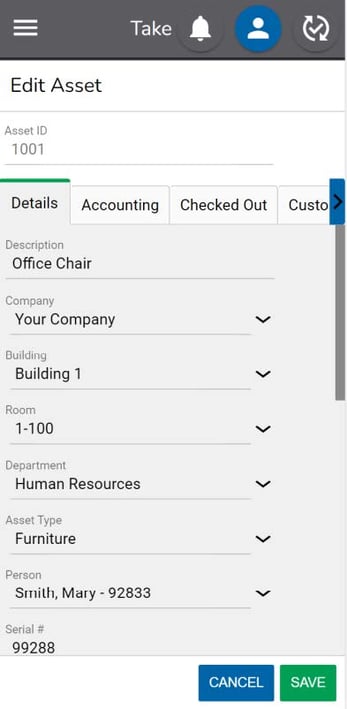
Once entered or scanned, the asset details will display. A user can make any other changes needed to the Asset (i.e., assignment to a new Person or Department) and then click Save to mark the asset as Found.
The user can then scan the next asset in the room and repeat the process until all assets found in that room are updated.
After moving to the next room, change the room value to the new location and then scan the assets in the next room and so on.
If an asset was found in a different room than the system expected, a message will notify the user and give them a choice to update the Room value to the new room or to keep the previous Room value.
If the asset is new to the system, a message will notify the user and ask if they want to add the asset. They can enter the new Asset ID and other relevant data and click Save to both create the asset and mark it as found.
If using an asset tracking system for the first time, this can be an efficient way to create asset data in the system. Often, new users will order pre-printed, sequential barcode labels or create their own and peel off the first label, tag the first asset, scan the barcode, and enter the asset information. This process is then repeated until all assets are tagged and entered in the system. This is more comprehensively detailed in the Printing section of this document.