The Assets tab contains your asset database and allows users to create new assets as well as edit existing assets manually and batch-style via importing a spreadsheet or csv file.
Prior to creating assets manually, it is recommended to create the asset attribute data that will display in the drop-down fields within each asset record. For instructions, see the Setup tab section of this document.
Users can edit the asset grid view with the  icon, allowing users to hide column visibility with the
  icon, and adjust column order by dragging the field names up and down.
Editing column order and visibility is per-browser, so one user’s view will not affect that of another user.
Creating, Deleting and Editing Assets
To create an asset manually, click the ![]() button. The only required field to create an asset is its Asset ID, the unique identifier tied to each asset in the system. It can be alphanumeric with up to 100 characters, but most organizations opt for short numeric values.
button. The only required field to create an asset is its Asset ID, the unique identifier tied to each asset in the system. It can be alphanumeric with up to 100 characters, but most organizations opt for short numeric values.
When done entering asset information, click the Save button to create the asset.
A copy of an existing asset’s metadata can be made by clicking the Copy button.
To delete the asset, click the Delete button. A warning message will be displayed prior to deletion.
To edit an existing asset, click the asset record in the grid. Assets in the grid can be searched using the ![]() icon.
icon.
Users can batch import assets with a spreadsheet or csv file by selecting the  icon.
icon.
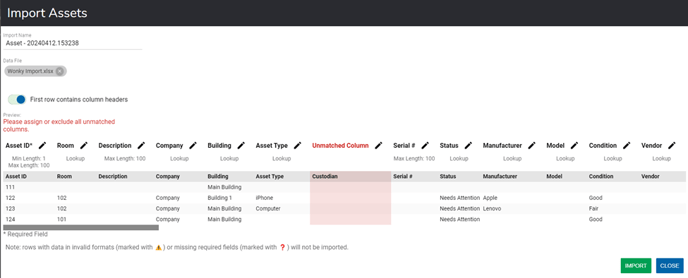
Once the user selects the desired file for import, the import tool will map the column headings of the file with the column headings in RedBeam. If anything does not align, the user receives the red error message above, and has the option to exclude the column or match the column to a field using the edit icon:

Once all columns are mapped, and the user selects “IMPORT,” RedBeam takes things a step further by letting the user know if records failed to import and why.
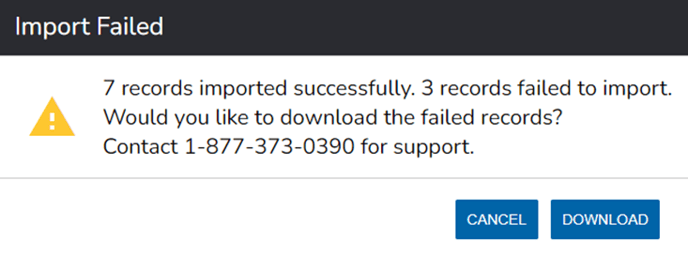
This option allows the user to download a file with information of which assets failed along with a clear error message as to why they failed. A common human error could be that cost was input as a negative value, for example.
Users can batch update assets by importing a spreadsheet or csv file. Importing will never duplicate or delete information. It will only create or update.
Details
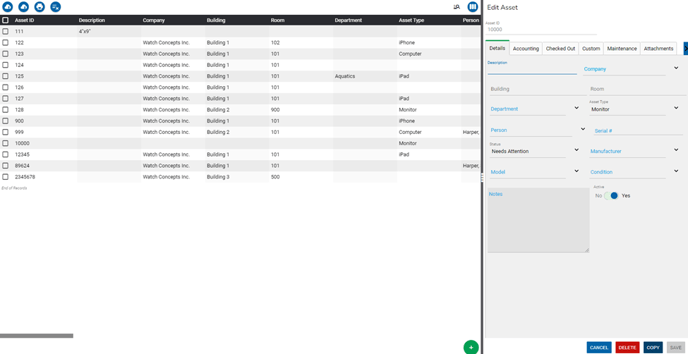
Enter asset information under the Details tab including:
- Asset ID – This is the number used to uniquely identify the asset. For barcode scanning to work properly, this complete number (including any leading zeros) should be encoded in printed barcodes used to tag the assets.
- Description – This is a description of the asset.
- *Company – This is the company to which the asset is assigned.
- *Building – This is the building in which the asset is located.
- *Room – This is the room in which the asset is located. Selecting a room is required when taking an inventory.
- Department – This is the department to which the asset belongs.
- Asset Type – This is the asset category that generally describes the asset.
- Person – This is the person to whom the asset is assigned.
- Serial # – This is the serial number of the asset. If an asset barcode is damaged or not visible, the user can scan or enter the serial number while updating or taking an inventory of the asset.
- Status – This is the status of the asset. Common examples include Available and Checked Out. Create new Status options in the Setup tab.
- Manufacturer – This is the company that manufactures the asset.
- Model – This is the model number of the asset.
- Condition – This is the condition of the asset. Common examples include good and damaged. Create new Condition options in the Setup tab.
- Notes – This is a free text field for additional information about the asset.
- Active – This is a Yes/No field. Assets marked as inactive, will not show in an Inventory or in Check In or Check Out transactions.
*Company, Building and Room belong to a three-tier, nested hierarchy in which a room belongs to a building and a building belongs to a company. See the Setup section for more details.
Accounting
Enter asset information under the Accounting tab including:
- PO # – This is the number of the purchase order on which the asset was purchased.
- Vendor – This is the vendor from whom the asset was purchased.
- Account – This is the financial reference account under which the asset was purchased.
- *Acquisition Date – This is the date on which the asset was purchased.
- *Cost – This is the price paid for the asset.
- *Recovery Period in Year – This is the period during which an asset is depreciated according to the manufacturer.
- *Scrap Value – This is the value an asset will be worth at the end of its life.
- *Depreciated Value – This is a calculated value that represents the cost minus the scrap value minus the amount deprecated.
- *Amount Depreciated – This is a calculated amount of how much money the asset has based on the current date when the user is accessing RedBeam.
- Warranty # – This is the number associated with the asset’s warranty.
- Warranty Start Date – This is the date that the asset’s warranty begins.
- Warranty End Date – This is the date that the asset’s warranty ends.
- Lease # – This is the number associated with the asset’s lease.
- Lease Start Date – This is the date that the asset’s lease begins.
- Lease End Date – This is the date that the asset’s lease ends.
*Depreciated value and amount depreciated are automatically calculated in RedBeam when a user inputs the acquisition date, cost, recovery period in years and optional scrap value. One month of the asset’s value is depreciated at the end of the first full month since the asset was acquired and subsequently at the end of each month after that until the asset is fully depreciated. The scrap value is subtracted from the cost prior to calculating depreciation.
Checked Out
The Checked Out tab shows information about the asset if it is actively checked out.
Check out information includes:
- Checked Out To – This is the Person the asset is checked out to.
- Checked Out Date – This is the date and time the asset was checked out.
- Reference # - This is the Reference # entered in the Check Out
- Project – This is the Project entered in the Check Out
- Due Date - This is the Due Date entered in the Check Out
Custom
The Custom tab includes additional date and time fields, open text fields, drop down fields and yes/no toggle fields.
Admin users can update the names of custom fields through Caption Override, further detailed in the Setup section of this document.
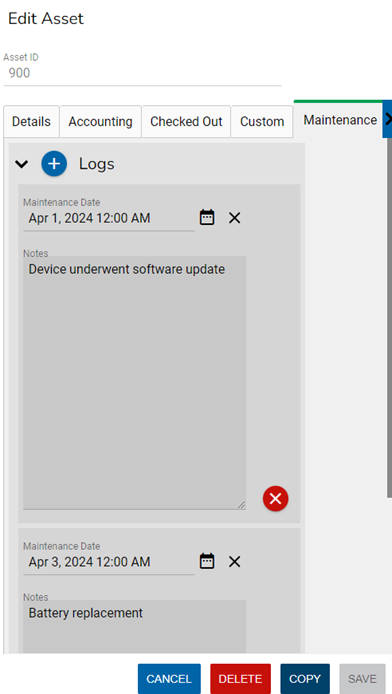
Maintenance
The Maintenance tab allows users to add maintenance logs for past, current or future dates and times.
Click the ![]() icon to create a new log, and select the date and time with the
icon to create a new log, and select the date and time with the ![]() icon.
icon.
Click the ![]() icon to delete the log.
icon to delete the log.
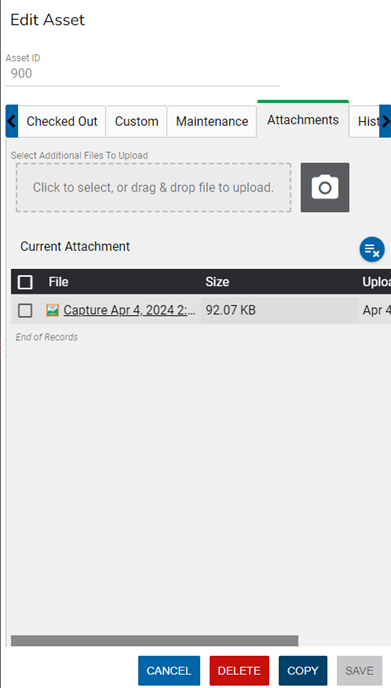
Attachments
Assets can also retain file attachments including but not limited to Excel files, Word documents and Images. Users may connect with the device camera to take photos of the asset in real time through RedBeam by selecting the ![]() icon.
icon.
To attach a file from the computer, select the file and save the asset.
History
A full history of changes to an asset are displayed in the History tab. This tab captures what change occurred to the asset, when the change occurred and who made the change dependent on the logged in user.
Export
Asset data can be exported using the  icon.
icon.
Exported files will reflect the column order and visibility as specified by the user, which can be altered using the ![]() icon.
icon.
Users can export files in the following formats.
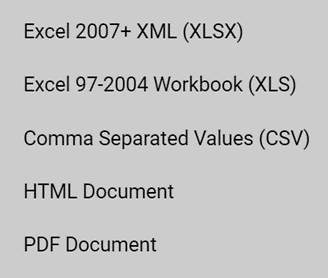
Choose the desired file format to export the data.
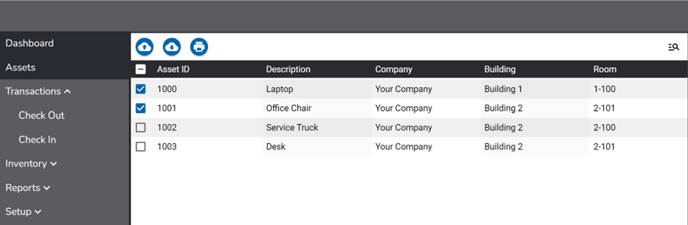
Printing Asset Labels
If using a supported barcode label printer, asset labels can be printed from the Asset screen.
To print labels, check the boxes next to the desired assets or select all by checking the black box outlined in white in the header.
Then click the ![]() icon and select the desired Printer and Label Template.
icon and select the desired Printer and Label Template.
If the desired Zebra printer is not visible from the Printer drop-down menu, follow these steps to connect it.
For more information on creating customizable label templates and setting up your printer, see the Label Printing section of this document.
A preview of the labels will be displayed in addition to a count of the total number of labels that will be printed.
Click Print to print the labels.
